
Anúncios
Want to capture stunning, professional-quality images without investing in expensive camera gear? Your smartphone is more powerful than you think, and with the right techniques, you can transform your mobile photography instantly.


The evolution of smartphone cameras has democratized professional photography like never before. Modern devices feature multiple lenses, advanced computational photography, and AI-powered enhancements that rival traditional cameras. Whether you’re building a social media presence, documenting travel adventures, or pursuing photography as a creative outlet, mastering mobile photography opens endless possibilities.
Anúncios
This comprehensive guide will walk you through essential techniques, settings, and creative strategies that professional photographers use daily. From understanding your camera’s capabilities to composing breathtaking shots and editing like a pro, you’ll discover how to unlock your phone’s full photographic potential. Let’s dive into the world of mobile photography and elevate your images from ordinary snapshots to gallery-worthy masterpieces. 📸
Understanding Your Smartphone Camera Settings
Before capturing amazing photos, you need to understand the tools at your disposal. Most people use their phone’s camera on full auto mode, but exploring manual settings unlocks creative control that separates amateur snapshots from professional-looking images.
Anúncios
Access your camera’s professional or pro mode, typically found in the settings menu. This mode reveals crucial controls including ISO, shutter speed, white balance, and focus options. ISO controls light sensitivity—lower values (100-200) work best in bright conditions, while higher values (800-3200) help in darker environments but introduce grain.
Shutter speed determines how long your camera sensor captures light. Faster speeds (1/1000s) freeze motion perfectly, ideal for sports or wildlife. Slower speeds (1/30s or longer) create artistic blur effects or help in low-light situations, though you’ll need steady hands or a tripod.
White balance adjusts color temperature, ensuring whites appear truly white under different lighting conditions. While auto white balance works adequately, manually selecting presets like daylight, cloudy, or tungsten produces more accurate colors and maintains consistency across multiple shots.
Mastering Composition Techniques That Transform Photos
Composition separates visually compelling photographs from forgettable ones. The rule of thirds remains photography’s most fundamental principle—imagine dividing your frame into nine equal sections using two horizontal and two vertical lines. Position key elements along these lines or at their intersections for naturally balanced, engaging compositions.
Most camera apps include a grid overlay to help visualize this framework. Activate it in your settings and practice placing subjects off-center rather than dead-center in the frame. This simple adjustment creates dynamic tension and visual interest that draws viewers into your images.
Leading lines guide the viewer’s eye through your photograph toward the main subject. Roads, fences, rivers, architectural elements, or even shadows can serve as powerful compositional tools. Look for natural lines in your environment and position yourself to maximize their impact.
Framing involves using elements within the scene to create a “frame” around your subject. Doorways, windows, tree branches, or architectural features add depth and context while focusing attention exactly where you want it. This technique adds professional polish to portraits, landscapes, and street photography alike.
Working with Negative Space
Negative space—the empty area surrounding your subject—can be as important as the subject itself. Minimalist compositions with ample negative space convey elegance, isolation, or emphasize the subject’s importance. Don’t feel compelled to fill every corner of your frame; sometimes less truly is more.
Lighting: The Foundation of Professional Photography ✨
Lighting makes or breaks any photograph, regardless of equipment quality. Understanding and manipulating light transforms ordinary scenes into extraordinary images. Natural light offers the most flattering, versatile illumination for mobile photography.
The golden hour—the first hour after sunrise and the last hour before sunset—provides warm, soft, directional light that flatters virtually any subject. Colors appear richer, shadows lengthen dramatically, and the quality of light adds professional polish effortlessly. Plan your photo sessions around these magical times whenever possible.
Avoid harsh midday sun, which creates unflattering shadows, extreme contrast, and washed-out colors. If shooting during midday is unavoidable, seek open shade under trees, buildings, or awnings. This diffused light maintains even exposure without harsh shadows.
Backlighting—positioning your subject between the camera and light source—creates stunning silhouettes or ethereal rim lighting effects. Tap on your subject to adjust exposure, or intentionally underexpose for dramatic silhouettes against colorful skies.

Indoor and Artificial Lighting Strategies
Window light provides beautiful, soft illumination for indoor photography. Position subjects near large windows, ideally with sheer curtains diffusing direct sunlight. The larger the light source relative to your subject, the softer and more flattering the result.
When working with artificial lighting, avoid direct overhead lights that create unflattering shadows. Position lamps at 45-degree angles to your subject, or use multiple light sources to fill shadows. White walls and ceilings bounce light effectively, acting as natural reflectors.
Focus and Depth Control for Professional Results
Sharp focus separates professional images from amateur attempts. Your smartphone camera uses both autofocus and manual focus options. Tap the screen where you want perfect sharpness—your camera adjusts focus and exposure simultaneously.
For more precise control, use manual focus available in pro mode. This becomes essential for macro photography, low-light situations, or when shooting through obstacles like fences where autofocus might hunt incorrectly.
Portrait mode or depth effect simulates the shallow depth of field characteristic of professional cameras. This feature blurs backgrounds beautifully while keeping subjects sharp, creating that coveted “bokeh” effect. Position subjects at least three feet from backgrounds for optimal separation and blur quality.
Multiple smartphones now feature different focal length lenses—ultra-wide, standard, and telephoto. Each creates different perspectives and compositional opportunities. Ultra-wide lenses exaggerate perspective and capture expansive scenes, while telephoto lenses compress distance and isolate subjects effectively.
Stabilization Techniques for Razor-Sharp Images
Camera shake ruins otherwise perfect photographs. While modern phones include optical image stabilization, proper technique ensures consistently sharp results, especially in challenging lighting conditions.
Hold your phone with both hands, tucking elbows against your body for stability. Lean against walls, trees, or other stable surfaces when available. Take a breath, exhale partially, and gently tap the shutter button rather than jabbing it forcefully.
Burst mode captures multiple frames rapidly, increasing chances of getting perfectly sharp images, especially with moving subjects. Hold the shutter button to activate continuous shooting, then select the sharpest frame later.
Invest in a small smartphone tripod or versatile flexible tripod that wraps around objects. These inexpensive accessories enable long exposures, low-light photography, group photos including yourself, and consistent framing for product photography or social media content.
Advanced Shooting Modes and Features
Modern smartphones pack specialized shooting modes that expand creative possibilities beyond standard photo capture. Exploring these features unlocks professional capabilities right in your pocket.
HDR (High Dynamic Range) mode captures multiple exposures simultaneously and combines them into a single image with balanced highlights and shadows. This works brilliantly for high-contrast scenes like sunsets or interior rooms with bright windows, preserving detail throughout the tonal range.
Night mode represents one of the most impressive computational photography achievements. It captures multiple frames over several seconds and combines them to produce surprisingly clean, detailed low-light images impossible just years ago. Keep your phone steady or use a tripod for optimal results.
Panorama mode stitches multiple images together, creating ultra-wide landscape photos. Move your phone smoothly and steadily in the direction indicated, keeping the guide arrow centered. Panoramas work beautifully for vast landscapes, tall buildings, or group photos in tight spaces.
Experimenting with RAW Format
RAW format captures unprocessed sensor data, providing maximum flexibility during editing. While RAW files require more storage space and processing, they preserve significantly more information than compressed JPEGs, enabling dramatic adjustments to exposure, color, and detail without quality degradation.
Portrait Photography Tips for Stunning People Photos
Capturing compelling portraits requires understanding both technical settings and human psychology. Eye contact creates immediate connection—ensure at least one eye appears tack-sharp, as this draws viewers into the image instinctively.
Shoot from eye level or slightly above for most flattering angles. Photographing from below emphasizes double chins and distorts features unfavorably. Natural expressions beat forced smiles—engage subjects in conversation and capture candid moments between posed shots.
Simple, uncluttered backgrounds prevent distractions from the main subject. Position subjects away from backgrounds to maximize blur in portrait mode. Pay attention to what appears behind subjects, avoiding “pole through the head” syndrome where background elements appear to sprout from people awkwardly.
Soft, diffused light flatters skin tones and minimizes texture. Window light, open shade, or overcast days provide ideal conditions. Avoid using your phone’s LED flash directly—it creates harsh shadows and unflattering skin tones. If additional light is necessary, bounce flash off ceilings or walls, or use a portable LED panel.
Landscape and Architecture Photography Excellence 🏔️
Landscape photography showcases the natural world’s grandeur. Ultra-wide lenses capture expansive vistas, but don’t forget telephoto options that compress distance and isolate interesting details within larger scenes.
Include foreground interest to create depth and lead viewers into the image. Rocks, flowers, streams, or other elements positioned in the foreground establish scale and three-dimensionality that purely distant subjects lack.
Weather conditions dramatically affect landscape mood. Stormy skies, fog, mist, or dramatic cloud formations often produce more compelling images than clear blue skies. Don’t pack your camera away when conditions seem less than perfect—embrace atmospheric conditions for unique results.
Architectural photography benefits from vertical lines remaining truly vertical. Modern smartphones include perspective correction features or guides that help align buildings properly, preventing the “leaning tower” effect caused by tilting your camera upward.
Macro and Close-Up Photography Secrets
Macro photography reveals intricate details invisible to casual observation. Your smartphone excels at close-up work, especially newer models with dedicated macro modes or lenses.
Get as close as your camera allows while maintaining focus. Tap to focus precisely on the most important detail—a flower’s stamen, water droplets, or an insect’s eye. Shallow depth of field at close distances means focus accuracy becomes absolutely critical.
Lighting challenges intensify at macro distances since your phone may block available light. Shoot during bright conditions or use external lighting positioned at angles to avoid harsh shadows. A simple white card or paper can bounce light into shadowed areas effectively.
Stability matters exponentially at macro distances—even tiny movements create blur. Use both hands, brace against stable surfaces, or employ a tripod. Burst mode helps ensure at least some frames achieve perfect sharpness.
Editing: Transforming Good Photos Into Great Ones
Post-processing elevates technically sound images to visually stunning final products. While capturing excellent in-camera images remains essential, thoughtful editing adds professional polish and personal style.
Start with basic adjustments—exposure, contrast, highlights, shadows, and saturation. Make subtle changes rather than extreme adjustments that look unnatural. If you need to increase exposure by more than one stop, consider whether the image is worth editing or if you should reshoot.
Crop thoughtfully to strengthen composition, remove distractions, or adjust aspect ratios for different platforms. Don’t hesitate to crop significantly if it improves the final result—modern smartphone sensors provide ample resolution even after aggressive cropping.
Color adjustments dramatically affect mood and impact. Adjust temperature (warm/cool), tint (green/magenta), and individual color channels for precise control. Consistency across a series of images creates professional cohesion, especially important for social media feeds or portfolios.
Powerful mobile editing apps include Lightroom Mobile, Snapseed, VSCO, and specialized apps for particular effects. Experiment with different tools to discover workflows and styles that resonate with your creative vision.
Essential Editing Workflow Steps
- Adjust exposure and contrast first to establish proper tonal foundation
- Fine-tune highlights and shadows to reveal or suppress specific details
- Modify white balance for accurate or stylized color rendering
- Apply selective adjustments to specific areas requiring different treatment
- Sharpen judiciously to enhance detail without creating artificial halos
- Reduce noise in high-ISO images using dedicated noise reduction tools
- Save edited files at maximum quality to preserve detail for future use
Common Mistakes to Avoid for Better Results
Even experienced photographers occasionally fall into bad habits that compromise image quality. Awareness of common pitfalls helps you consciously avoid them and accelerate your improvement trajectory.
Digital zoom degrades image quality dramatically compared to optical zoom or simply moving closer physically. Your phone crops and enlarges the image, reducing resolution and sharpness noticeably. Whenever possible, use your feet to zoom—walk closer to your subject rather than relying on digital magnification.
Over-editing produces unnatural-looking results that scream “amateur.” Excessive saturation, extreme clarity adjustments, or heavy-handed filters destroy realism and subtlety. When editing, periodically compare your adjusted version against the original to ensure you haven’t gone too far.
Relying exclusively on auto mode limits creative growth. While auto settings produce acceptable results in many situations, they can’t interpret your creative vision or optimize for specific artistic effects. Gradually incorporate manual controls as your understanding grows.
Ignoring composition fundamentals undermines technical excellence. A perfectly exposed, tack-sharp image with poor composition remains visually uninteresting. Prioritize strong composition, then ensure technical execution supports your creative vision.
Building Your Mobile Photography Skills Continuously 📚
Photography mastery requires consistent practice and continuous learning. Set personal projects that push you beyond comfort zones—shoot exclusively in black and white for a week, capture only reflections, or document a single subject extensively.
Study work by photographers you admire, analyzing composition, lighting, and creative choices. Don’t just appreciate beautiful images—actively dissect how they were created and attempt to recreate similar effects yourself.
Share your work and seek constructive feedback from photography communities, both online and locally. External perspectives reveal blind spots and suggest improvements you might overlook independently.
Participate in daily or weekly photography challenges on social media platforms. These structured exercises provide creative prompts, accountability, and exposure to diverse approaches from participants worldwide.
Remember that equipment limitations breed creativity. Some of photography’s most iconic images were captured with far less sophisticated equipment than your smartphone provides. Focus on vision, timing, and storytelling rather than fixating on gear limitations.
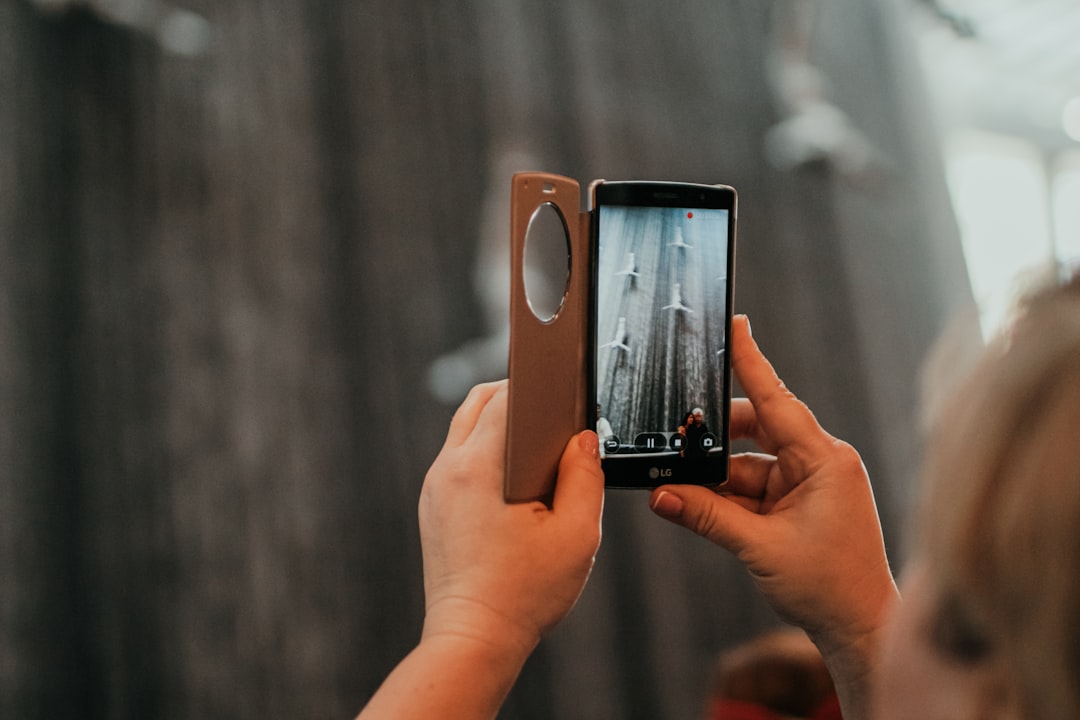
Turning Your Mobile Photography Into Opportunities
As your skills develop, numerous opportunities emerge to monetize or share your mobile photography passion. Stock photography platforms accept high-quality smartphone images, generating passive income from your existing work.
Social media influence grows naturally when you consistently share compelling content. Brands increasingly partner with content creators for authentic marketing, and mobile photography’s accessibility makes it perfect for building engaged audiences.
Print-on-demand services enable selling your images on products like prints, phone cases, or apparel without inventory investment. Your best photographs can become physical products that generate revenue while sharing your artistic vision.
Local businesses often need professional-looking images for websites, social media, or marketing materials. Your smartphone photography skills combined with business savvy can fulfill these needs affordably while building your portfolio and income.
The journey from smartphone snapshots to professional-quality mobile photography requires patience, practice, and persistence. Every image you capture teaches valuable lessons about light, composition, timing, and creative vision. Your smartphone camera’s capabilities already exceed what professional photographers had access to just decades ago—the only remaining barrier is knowledge and practice, both entirely within your control. Start implementing these techniques today, and watch your mobile photography transform from ordinary documentation to extraordinary visual storytelling. 🌟
